How to Track Changes in Word: For Both Mac and PC Users
You’re working with an editor on your book, and you want to track your changes. See how to do this on a Mac and PC!
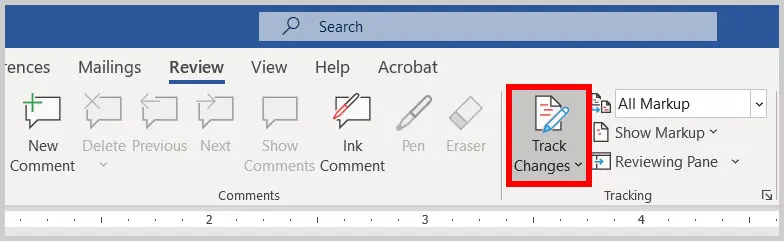
Step 1: Open the Word Document and under the “Review” tab, turn on “Track Changes.”
This is essential so your editor knows the difference between the work you’ve done and the work they’ve done to this point.
Here’s what it looks like.
Step 2: Accept or Reject All Changes
We suggest you review and accept (or you can reject certain changes) everything in red, which represents the changes we’ve done.
Pro tip: Do two distinct passes to simplify your task.
Pass 1: Spot check editorial changes.
On the first pass, just scan through all the changes to ensure you like the edits, or reject certain changes (see directly below).
Then, “Accept All Changes” globally instead of individually (see below).
Pass 2: Respond to comments and make your own edits.
On the second pass, you can respond to all comments and track your new changes.
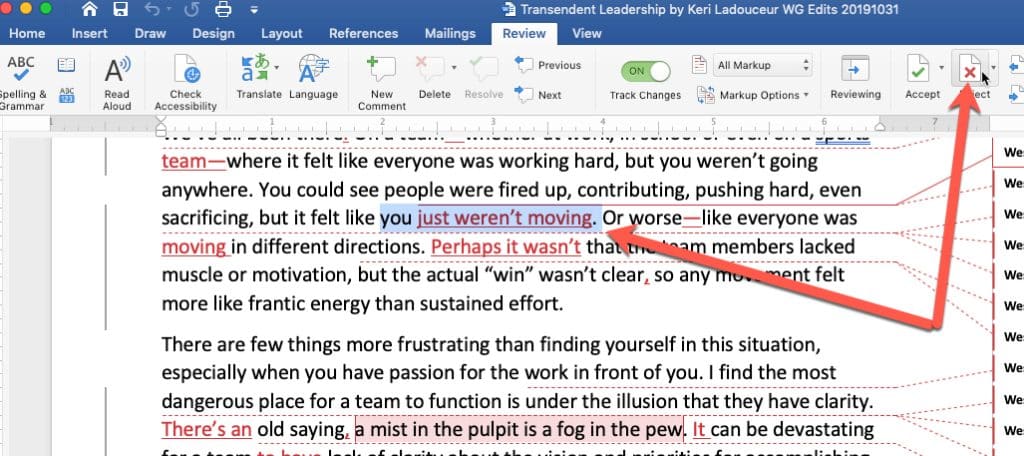
How to Reject Certain Changes. Reject any particular change you disagree with.
Do this by highlighting what you want to reject, then click on the red X.

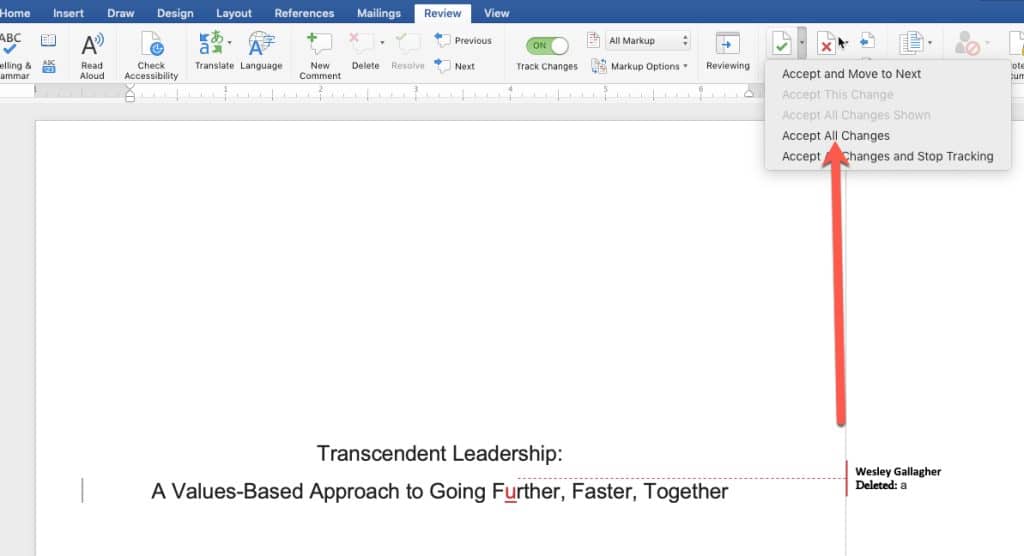
How to Accept All Changes. Instead of accepting each change individually, which you can do in a similar manner to what you just saw directly above, you can save time by accepting all changes in the whole document.
Do this by clicking on the arrow next to the green check and selecting “Accept All Changes.”

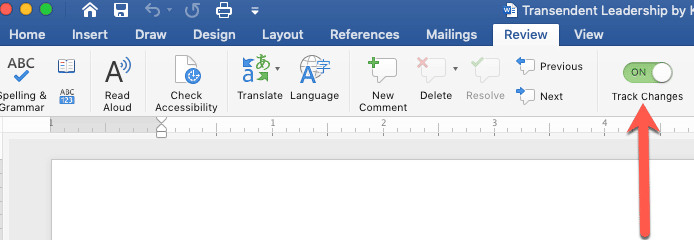
Step 3: Make sure track changes is still marked “On.”
Before you start your edits, make sure track changes is on. The editor wants to see your changes as you go about making your edits.
Step 4: Respond to Comments
Once you have accepted or rejected our changes (see Step 2), respond to each comment we’ve made. You will take one of three actions for each comment:
- Make a change in the text with track changes turned on (and then delete the comment),
- Respond to our comment with your own comment in another, separate comment box, or
- Disregard the comment by deleting it.
Important Note: Make sure to address every single comment in one of these ways so that in the end, there’s no comments left except for unresolved issues and design comments!
Step 5: Send the Manuscript Back
Once you’ve completed Steps 1–4, send the manuscript back to our team.
At that point, we’ll review your changes and move forward to the next phase!
This blog was written for active YouPublish clients. If you want to utilize our services, begin by filling out a quote request form here.